
Using Libraries to Reuse or Update Page Elements
Dreamweaver provides two types of assets that can help you create Web pages with a consistent content and design — templates and libraries. Use libraries to store items you'd like to use on multiple pages that do not have an identical layout — when you'd like to reuse headers and footers, for example, with different layouts in between. You might also create a library item for content that appears on only a few pages but must be updated frequently. If you want to create multiple pages that have an identical layout, see Using Templates for Consistent Design.
- Creating a Library Item
- Inserting a Library Item in a Document
- Making Changes to a Library Item
- Deleting a Library Item
- How to Learn More
Creating a Library Item
Creating a Library item is simply a matter of defining existing content (text, image, etc.) as such.
- Open the document containing the content to be so defined.
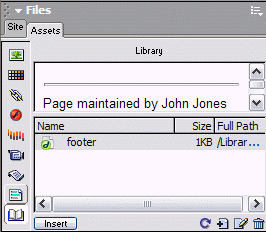
- Open the Files panel group and click the Assets button (or, from the Window menu, choose Assets) to open the Assets panel. The Assets panel is shown in Figure 1, below.
- In the
Assets panel click the Library button —
 .
. - In the document window select the desired content.
- Click
the New Library Item button —
 —
at the bottom of the Assets panel.
—
at the bottom of the Assets panel. - A new Library item will be listed as "Untitled". Replace "Untitled" with the name you want to give the item.
That's all there is to it. The selected content becomes highlighted in green (by default) in the document. The highlight color changes to red if you select the item [see "Making Changes to a Library Item" (below)].
Notes:
- Alternatively, you can select the content and (a) click and drag it to the Assets panel, or (b) choose Modify | Library | Add Object to Library.
- Library items can contain <body> content only.
- Avoid using a library item within a template. Instead, include the elements you want to repeat in the locked regions of a template.
- Dreamweaver gives library files the extension .lbi and places them in a folder named Library within the local site folder. (HTML styles, if any, are also stored in the Library folder — in a file called styles.xml)
Inserting a Library Item in a Document
To place the content of a library item in a web document, first position the insertion point where you want to place the item. Then, in the Assets panel, select (click) the desired item and click the Insert button at the bottom of the panel. Alternatively, you can click and drag the desired item from the Assets panel into the document window.
Note: When you insert a library item as described above, a reference to the item is inserted in the document along with the content. It is also possible to insert library content without including the reference, thus making it possible to modify the content within the document but making it impossible to update the content automatically. To insert library content without including the reference, hold down the Ctrl button (Windows) or Option button (Macintosh) while dragging the item from the Assets panel.
Making Changes to a Library Item
Editing Library Content
To edit a library item, you can do one of the following:
- Select
(highlight) the item in the Library panel and click the Edit
button —
 —
at the bottom of the panel to open it (or double-click the library item).
Make the desired changes, and then exit and save the library file.
—
at the bottom of the panel to open it (or double-click the library item).
Make the desired changes, and then exit and save the library file. - In a document containing the library item, highlight the item and then click the Open button in the Property Inspector. Make the desired changes, then exit and save the library file.
Making a Library Item Editable
In the document where you want to edit a library item without changing other instances of that content, select the item and then click the Detach from Original button in the Property Inspector. Edit the content as desired. Be aware, however, that as soon as you "detach from original" the selected content is no longer a library item (and the highlighting disappears).
Deleting a Library Item
You can delete a library item by selecting (highlighting) it in the Assets panel and clicking the Delete button (a trash can at the bottom of the panel). This deletes the item but does not change the contents of any document that uses the item (even the highlighting remains).
You can recreate a deleted library item by locating and selecting an instance of the item within a document and then clicking the Recreate button in the Property Inspector.
How to Learn More
You can use the Dreamweaver Help feature to learn more about both standard and layout tables. To use the Help Index, do the following.
- From the Help menu choose Using Dreamweaver.
- In the left panel of the Help window choose the Index tab.
- Type library in the keyword text box.
- From the listing that displays, click the desired topic.
- Click the Display button at the bottom of the panel to display the topic text in the right panel.
August 14, 2003
Prepared by Gail Said Johnson, User Support Services
ITR's technology training guides are the property of California State University, Northridge. They are intended for non-profit educational use only. Please do not use this material without citing the source.