
vDrive at CSUN
Publishing Video Content to Your vDrive
The vDrive resource has been created at CSUN to better serve the needs of faculty who wish to employ video on demand as an element in their web presence. The process is simple. This document will descibe the steps involved in publising your video clip for on demand access. The process begins with mapping your vDrive, dragging and dropping the clip into your Movies folder inside the vDrive, where it is available for streaming.Publishing Steps
If you have not already mapped your vDrive on your Macintosh or PC, please see the specific platform related instructions below in this document.Develop your video content
There are many different formats that video may come in. For publishing to the campus 's video server, the vDrive, the clip must be in one of the following formats: DV, QuickTime (with MPEG-4 and AAC support), Video for Windows (AVI), MPEG-1, MPEG-2, MPEG-4, MPEG Layer I Audio, MPEG Layer II Audio, AIFF/AIFC, AU, Sound Designer II, WAV, OpenDML, Macromedia Flash, and other video, audio, animation, and still-image formats.Other formats are not supported at this time.
Place content on the vDrive
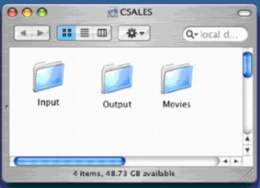
The first time you map to the vDrive you will see he following folders: Input, Output and Movies. The process of have your video clip available for streaming on demand is simple.
To make a video clip available for use from your web site, the following steps must take place:
- The clip must be placed in the Movies folder.
- The file (xxxxx.mov) is now ready for streaming.
- The path/URL for the file is:
- http://vod.csun.edu/~xxxxx/xxxxx.mov
where ~xxxxx is the specified user account and where xxxxx.mov is the name of the video clip cleansed for video on demand.
Attention: If your have previously put a clip in your Movies folder with the same name into the Output folder, the original clip will be overridden.
Update your web pageCreate a link on your web page for the new video link. Make sure that your path information is correct or your video will not play on demand.
Mapping your vDrive
What is the vDrive?If you have mapped your uDrive (your email and data storage space) then you can map your vDrive. The vDrive is an extra storage area that provides additional disk space for campus users who wish to store video files on a remote server. This storage will provide on demand access to video clips for teaching and administrative purposes.
Note: To activate your vDrive the first time, you may have to change your password. If you have changed your password to enable your uDrive, you do not need to change it again. Go to http://www.csun.edu/account and change your current password. Your vDrive will the be recognized. This need only be done once.
Mapping your vDrive using a PC
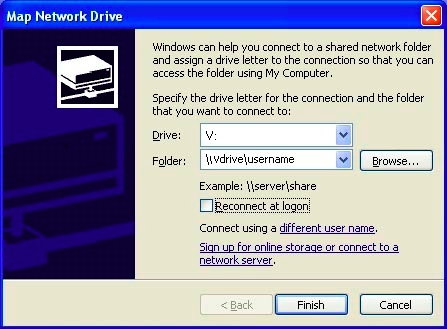
- Right click the My Computer icon on your desktop, and select Map Network Drive... The "Map Network Drive" window appears.
- In the Drive: box, click the down arrow and select the V: drive from the list of available drive names for the drop down menu, the default drive name is Z:.
- Click in the Folder: text box and type \\vdrive\xxxx where xxxx is you campus account user name, e.g. jsmith.
- Click Finish.
- In the Connect to vDrive window, type your campus user name and password, and click OK or press Enter.
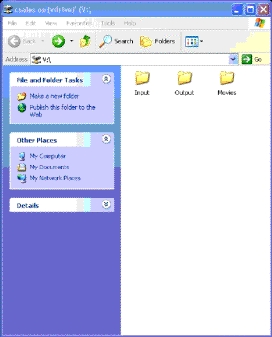
- The My Computer window
will open, showing your mounted vDrive. Double click the
icon.
- A window listing your files and folders, including the following folders: Input, Output and Movies will be displayed in the My Computer window. You may copy, move, and delete flies to and from this drive, the same way you use any window on your PC.
The title bar of this window reads something like xxxx on 'vDrive@CSUN (vdrive)' (V:) where xxxx is you campus account user name. This window displays the My Computer component of Windows. In fact, most of its features are the same as those in My Computer. It may also be used in Windows Explore view mode.
Mapping your vDrive using a Mac
Under
the Go menu on the blue apple menu bar at the top of the display,
choose Connect to Server.
In
the Connect to Server window, type in the location of the
account that you wish to map. The correct format for the path
is smb://vdrive.csun.edu/xxxx where xxxx is your campus account
user name. Then click the Connect button.
In
the Authentication window, leave the Workgroup/Domain
box blank. Type in your campus Username and Password
in the boxes indicated. Then click the OK button.
The
icon for your vDrive will appear on your desktop.
Double-click
it open to see its contents.
A window listing your files and folders, including the following folders: input, output and movies will be displayed in the vDrive window. You may copy, move, and delete flies to and from this drive, the same way you use any window on your Mac.
April 21, 2005
Prepared by Chris Sales, User Support Services
ITR's technology training guides are the property of California State University, Northridge. They are intended for non-profit educational use only. Please do not use this material without citing the source.