Tutorial for the Light Microscope
SED 695B; Fall 2005
A video of a cell dividing to show you the power and usefulness of the microscope in science.
The compound light microscope
Standard procedures to use a light microscope.
Labelled drawings to review parts and uses of the parts of a microscope.
Video directions on how to make a wet-mount slide.
Video directions on how to use the light microscope
This tutorial is to teach basic usage for a compound light microscope. It covers:
1.how to carry the scope
2.how to make a wet mount slide
3.how to focus on an image
4.the mirror image quality of what the student is looking at
5.how to change from one objective lens to a higher one
Study Guide:
Study Guide for Microscope Tutorial
Click here for a downloadable version of this study guide in word
With your microscope, follow the directions on this sheet to learn more about how your light microscope functions. Go through the tutorial. Watch all the videos. Click on the bookmarks at the bottom and experience those different websites. When you have done that, follow along with these questions to complete the tutorial.
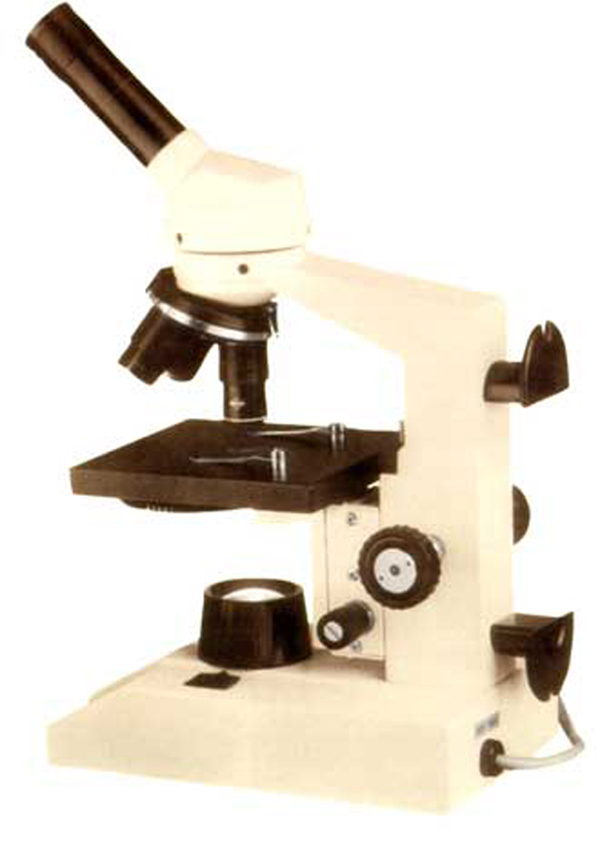
1. Fill in the parts of this scope. Check your answers by double-clicking on the picture in the tutorial.

2. What is the correct way to carry your light microscope?
3. Again, watch video #1. I am using the 40X objective lens. What is the total magnification of the specimen?
4. In front of you, you have a slide, the letter “e”, water and a cover slip. Follow the directions on the second video to make your slide. Why does the coverslip have to be placed on the slide diagonally?
5. Watch the third video again. Place your slide on the scope correctly and using the lowest objective, focus in on the “e” on your slide. Why do you think it is important to start with the smallest objective?
6. Watch the last two videos, #5 and #6 on how the image you see is the mirror image of the specimen. Try to move your IMAGE to the right, which way did you have to move the slide? Center the “e” back in the middle of the scope. Now move the image to see the very top of it. In what direction did you move the slide on the stage?
7. Look again at video #4, increase the magnification of your “e” from 40X to 100X. What adjuster should you use now to focus in on the larger image? Why?
8. What are two things you learned from the first bookmark, the animated tutorial?
a.
b.
9. Look through the next link on how the microscope works and view the video. What do the red arrows represent in the video?
|
On your study guide fill out all the parts of the microscope. When you are done, double click on the picture and check your answers. |

This is the correct way to carry the microscope, one had on the base, and one on the arm. They are expensive, treat them well.
1
revolving nosepiece. It discusses how to calculate total magnification of the specimen.
2
Video showing how to make a wet mount slide with the letter "e".
3
4
Video describing how to focus the specimen
This video teaches students how to increase the magnification from 40X to 100X.
These two videos show how the student is really looking at the mirror image of the specimen, so to see something toward the left, the student needs to move the slide to the right, and to see something at the top of the image, the student needs to move the slide down.
References & Links:
This first link is a animated tutorial for the light microscope
http://www.udel.edu/Biology/ketcham/microscope/scope.html
This next link is a schematic and video explaining how the optics of a microscope work
http://laxmi.nuc.ucla.edu:8248/M248_98/iphysics/micro.html
The link below is the resource for the movie of cells dividing at the top of the page.
http://www.aecom.yu.edu/aif/gallery/today/div1web.mov