This is a tutorial only. No login is required.
INTRODUCTION
This guide reviews how CSUN staff granted security access to the Schedule of Classes (SOC) add or modify existing class sections using the Maintain Schedule of Classes component for the following pages: Basic Data, Meetings, Enrollment Control and Notes. Managing Final Exams is addressed in a separate guide.
Step 1
After logging into the myNorthridge Portal:
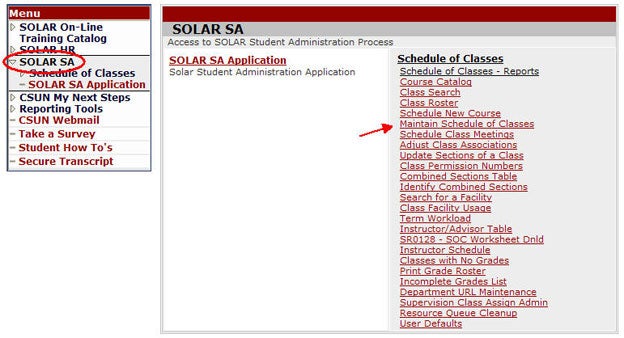
- Click SOLAR SA.
- Click Maintain Schedule of Classes.
Step 2
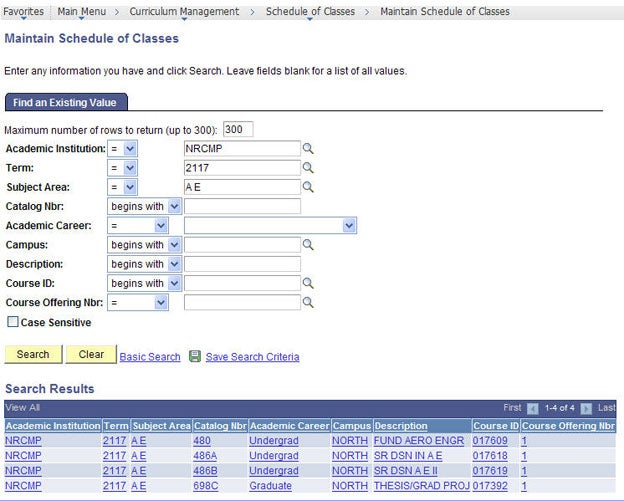
The Find an Existing Value page displays.
- Enter the Term.
- Enter a Subject and click Search.
- Select the course from the Search Results.
If the course does not display in the Search Results, use Schedule New Course and continue with Step 4 in this guide.
Step 3
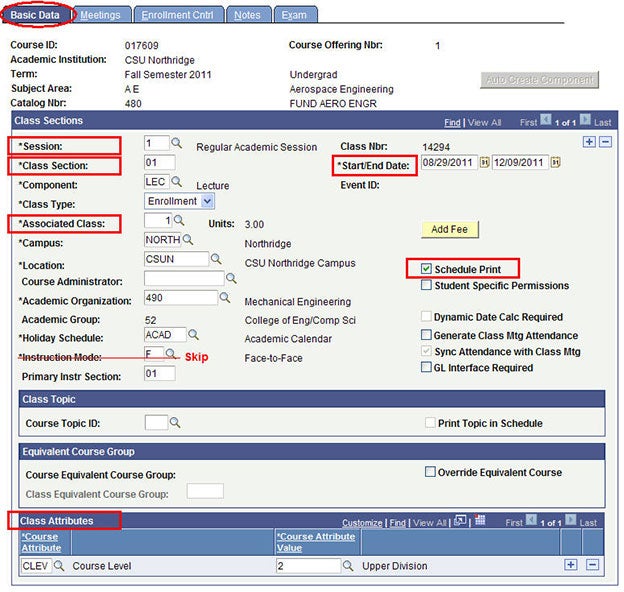
The Basic Data page displays.
- To add a new class section, click the plus sign (+).
- To modify an existing class section, skip to Step 4.
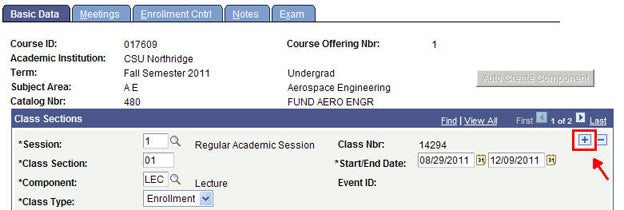
Step 4
Use the navigation tools to move between class sections. The 5-digit class number is automatically generated after saving a class section record.
Verify and edit the following fields:
Step 5
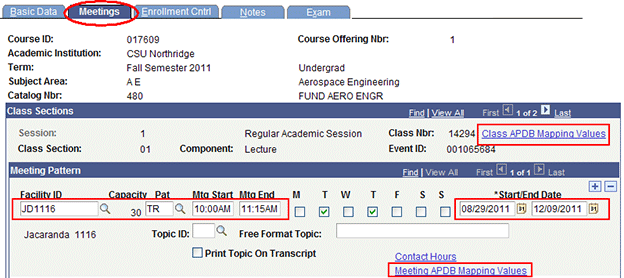
Go to the Meetings page to enter the class meeting patterns and instructor information for the fields listed below.
Enter a Meeting Pattern:
- Class APDB Mapping Values
- Facility ID
- Pat
- Mtg Start and Mtg End Times
- Day Checkboxes
- Start/End Date
- Meeting APDB Mapping Values
Do not leave the start/end times blank whenever the Pat field has a value other than ARR.
Enter Instructor(s) For Meeting Pattern assignment:
On the Assignment Tab, enter the:

Most fields on the Workload Tab default automatically. Modify fields as needed:
Click the plus sign (+) to add additional meeting patterns and instructor rows.

Step 6
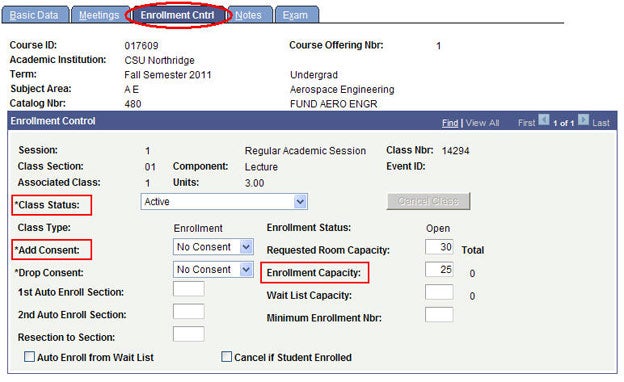
Go to the Enrollment Cntrl page to enter the enrollment requirements and seating capacity for the fields listed below:
Step 7
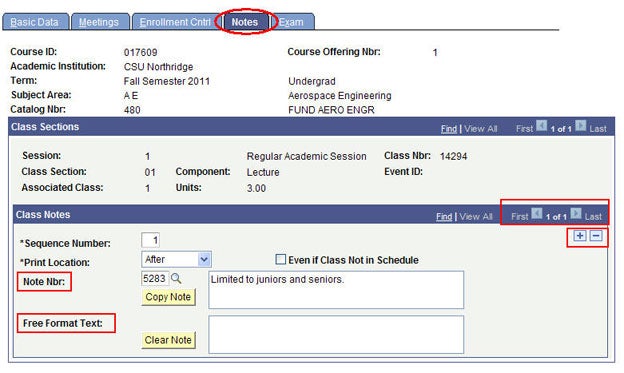
Go to the Notes page to add or remove a class section note.
Only one note is allowed per row. Click the plus sign (+) to create rows for additional notes.
Click SAVE when done.
SOLAR validates data in all sections when saving. If an error prevents you from saving the record, remove the room and then save. Use Facility Usage to check room availability--it could assigned to another class.
Click Return to Search to exit.
TIPS:
- Always enter corequisite notes first. It will be easy to update class numbers after term roll.
- Keep text notes consistent. Check spelling, punctuation, capitalization and grammar.
- To remove a note, use the minus sign (–).