This is a tutorial only. No login is required.
INTRODUCTION
This guide reviews how CSUN staff granted security access to the Schedule of Classes (SOC), specifically College SOLAR Coordinators, cancel classes. These instructions provide basic class section edits using the Maintain Schedule of Classes component for the following pages: Meetings, Enrollment Cntrl and Exam.
Department coordinators must contact their designated College SOLAR Coordinator in the dean's office to request a class cancelation.
NOTES:
- Never cancel an EXT section (section numbers 80 and above).
- Notify all enrolled and wait listed students and offer alternate class options.
- Do not instruct students to drop a class that will be canceled. Doing so will prorate refund amounts after the start of classes.
- Canceling a class drops all enrolled students. Ensure that the department has a Class Roster on file before canceling a class.
- A cancelation date is recorded on the Enrollment Cntrl page. Do not reactivate the class section unless it was inadvertently canceled and students will re-enroll in the same section.
Step 1
After logging into the myNorthridge Portal:
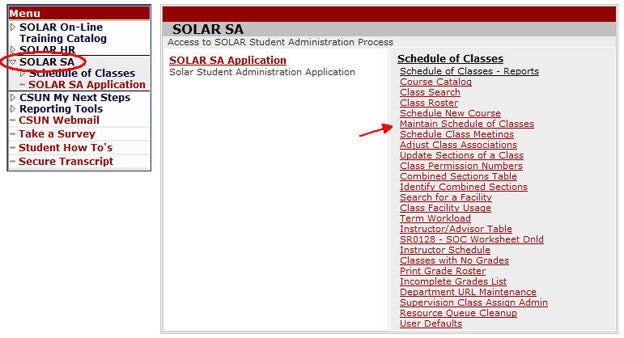
- Click SOLAR SA.
- Click Maintain Schedule of Classes.
Step 2
The Find an Existing Value page displays.
- Enter the Term.
- Enter a Subject and Catalog Nbr.
- Click Search.

Step 3
Do NOT cancel an EXT section.
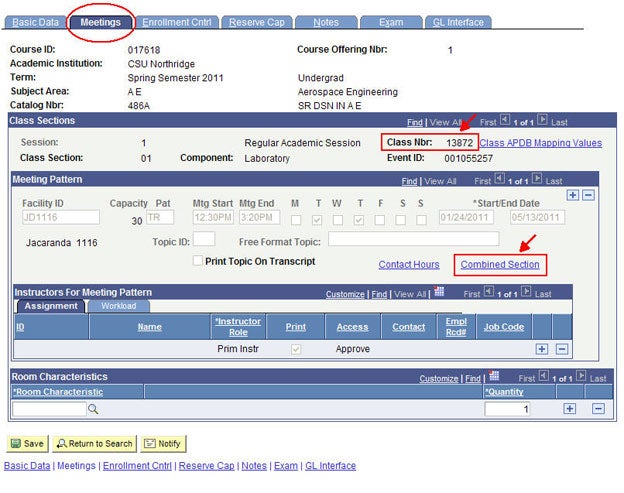
Go to the Meetings pageand navigate to the Class Nbr you want to cancel. Look for a Combined Section link. No link, skip to Step 4.
If the link displays, follow A or B instructions below:
A. Combined & Enrollments exist—
- Uncombine before canceling. After uncombining, SOLAR deletes the meeting pattern of ALL classes in the group. Reenter the pattern in one section and SOLAR will populate in the remaining active sections.
- Once uncombined, return to Step 4 of this guide.
B. Combined & No Enrollments exist—
- Don't cancel. Instead use this workaround to avoid rebuilding meeting patterns that would otherwise be lost. This will also prevent the class from showing up on the Low Enrollment report.
- Change the Enrollment Capacity to zero.
- Change the Class Status to tentative.
- You're finished and do not have to continue this guide.
Step 4
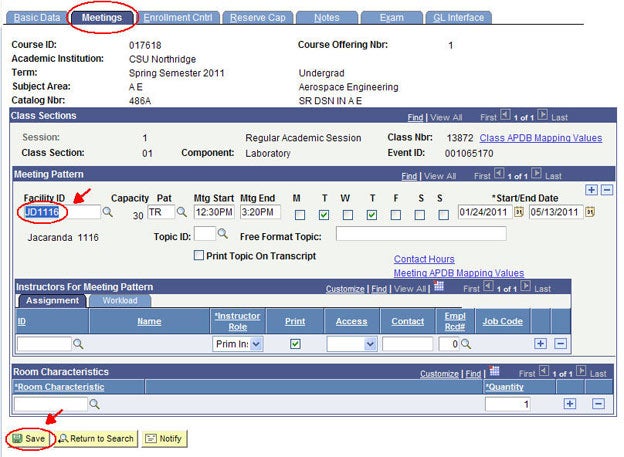
The Meetings page displays.
Highlight the Facility ID and press the Delete key on your keyboard.
Step 5
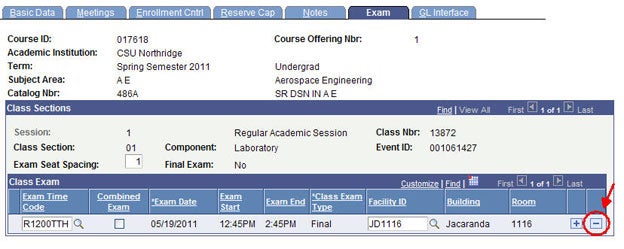
Go to the Exam page.
If an exam exists, do the step below. Otherwise, skip to Step 6.
- Click the minus sign ( – ) to delete the entire exam row.
Step 6
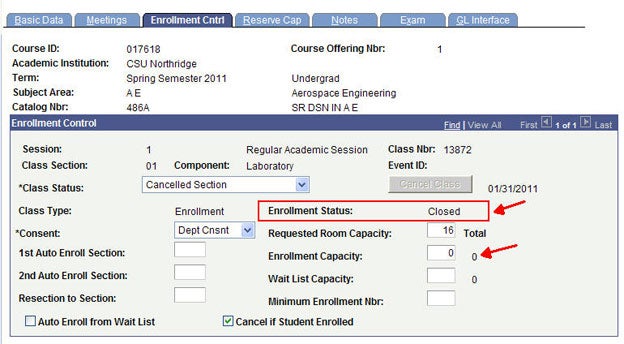
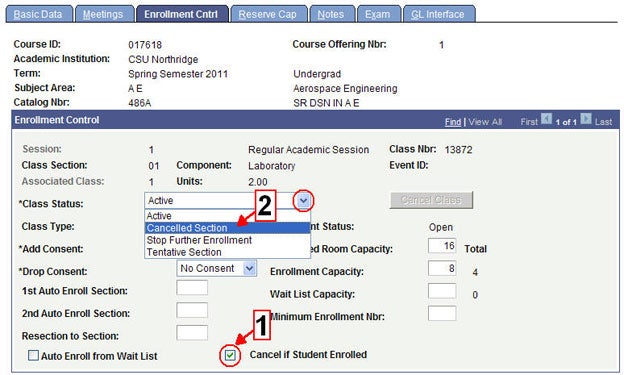
Go to the Enrollment Cntrl page.
- Check the Cancel if Student Enrolled box if students are enrolled.
- Change the Class Status to Canceled Section.
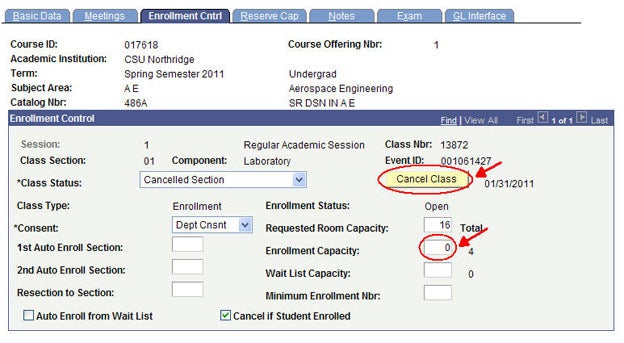
Step 7
When activated, the Cancel Class button turns yellow.
- Verify the Class Nbr.
- Change the Enrollment Capacity to zero.
- Click Cancel Class.
Step 8
When activated, the Cancel Class button turns yellow.
- Verify the Class Nbr.
- Change the Enrollment Capacity to zero.
- Click Cancel Class.