This is a tutorial only. No login is required.
INTRODUCTION
This guide reviews how CSUN staff granted security access to the Schedule of Classes (SOC) creates general permission numbers thereby setting consent and restricting enrollment in a class using the Maintain Schedule of Classes and Class Permissions components. For students to successfully enroll in consent-required sections, they must contact the department or instructor to obtain permission.
Two types of permissions can be assigned to restricted classes in SOLAR. Each permission type lends itself to a distinct enrollment situation:
- General permission numbers are generic numbers used to add students whose identities are not already known (e.g., to fill available seats for a GE course in a large lecture hall, for advisors to distribute in satellite areas). Follow the steps in this guide.
- Student specific permissions uses the 9-digit Student ID (no other number) for students already identified as eligible (e.g., in smaller and more carefully monitored programs like Physical Therapy). Refer to Create Student Specific Permissions guide.
All classes require permission during the second through the fourth weeks of Late Registration (see Build Instructions calendar for specific dates).
Permissions of either type do not override overall student limitation rules such as:
- Time conflicts
- Enrollment beyond the maximum unit limits
- Duplicate enrollment in the same class
- Registration holds
- Enrollment in repeated courses prior to the date repeating is permitted
Permission numbers can be reused until:
- The student successfully enrolls in the class
- The expiration date set by the department or professor is reached
- The close of Late Registration/Schedule Adjustment when self-service registration ends
Most common problems students have using permisson numbers:
- A permission number was used for the wrong class. Tell students that a permission number can only be used for a specific class section and is not interchangeable with other classes.
- Department or instructor gave a student a permission number for the wrong class. Verify the permission number before issuing to student.
- A student wants to know why a permission numbers didn’t work. Check the permissions <tab> (Class Permissions component) to view the override boxes for an individual number. You may have issued a permission number that has the “Reqs Not Met” box unchecked and thereby render the permission numbers useless to a student whose prereq is not articulated.
- Department or instructor set an expiration before the close of self-service registration. Change the date to enable the permission number.
Step 1
- Log into myNorthridge Portal.
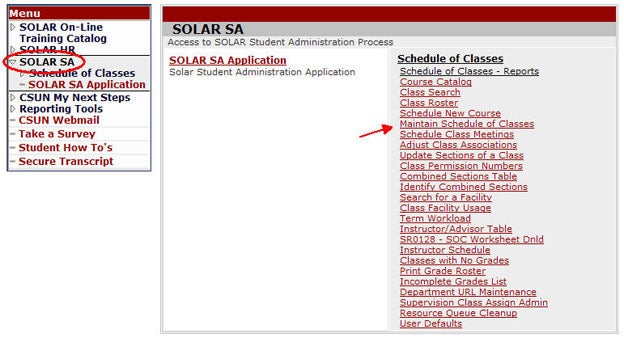
- Under the Staff Tab, click SOLAR SA.
- Click Maintain Schedule of Classes.
Skip to Step 4 - If you set consent during build for restricted classes and just want to know how to generate more permission numbers.
Step 2
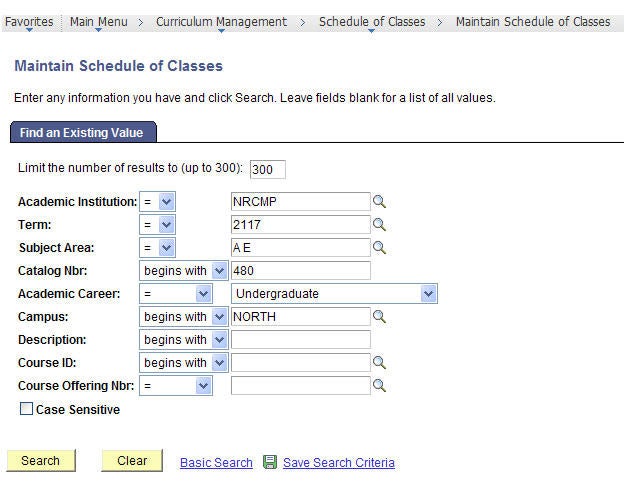
On the Find an Existing Value page:
- Enter the Term
- Enter a Subject
- Enter the Catalog Nbr (if known)
- Click Search
- Select a course from the Search Results
Step 3
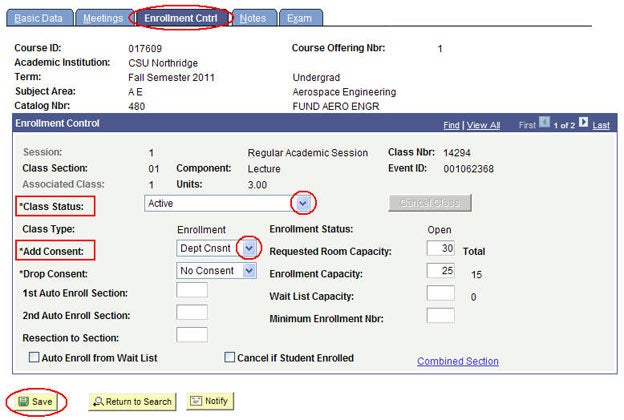
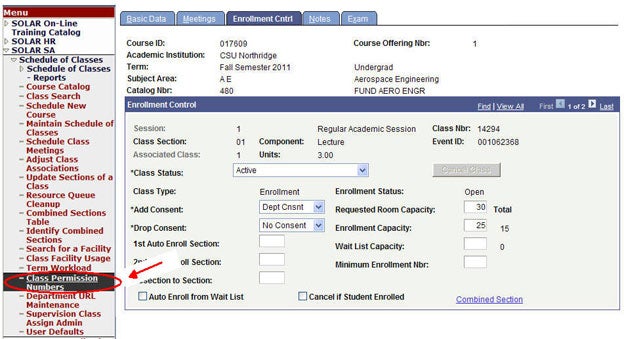
Go to the Enrollment Cntrl page.
Verify and edit the following fields to set consent to restrict the class:
- Class must be active in order for students to enroll.
- Enter Department or Instructor Consent in the *Add Consent field.
- Click Save
Do not change the *Drop Consent default "NO CONSENT" because students will be unable to drop their classes. This feature is not used at CSUN at this time.
Step 4
Go to the Class Permission Numbers component to create permission numbers.
If using the SOLAR SA Application navigation, the path is: Main Menu > Records and Enrollment > Term Processing > Class Permissions.
Step 5
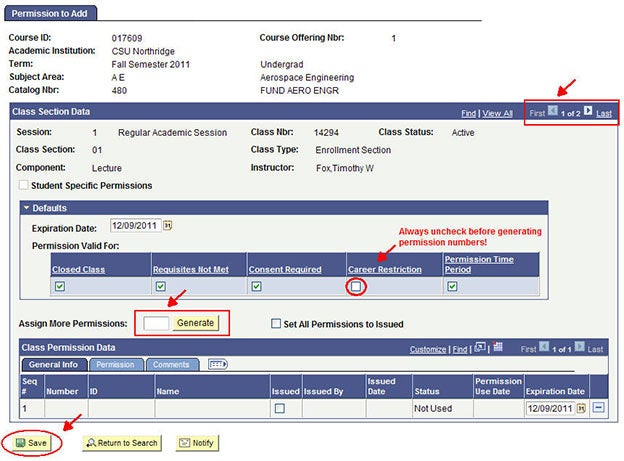
The Class Permissions component opens and the Permissions to Add page displays.
The "GENERATE" button is absent in the View All mode. View one class at a time when creating permission numbers.
- Navigate to the class.
- Verify the Class Number.
- Before you generate permission numbers, determine how they will work by reviewing the Permission Valid For section. To override class requirements, leave ALL boxes checked except for Career Restriction. This override must be unchecked whenever you create permission numbers to prevent the crossing of enrollment between credit and non credit courses.
- Enter the number of permissions in the Assign More Permissions box.
- Click Generate.
- Click Save.
Learn more about:
Step 6
Optional
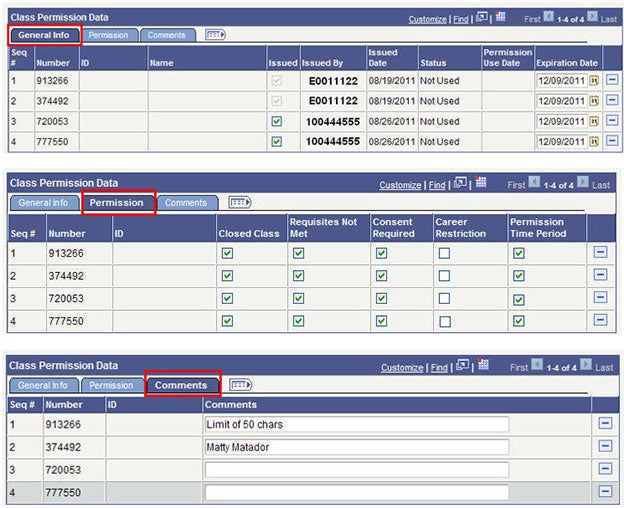
If necessary, manually adjust individual permissions using the fields on the following tabs:
On the Class Permission Data tab, a checkmark means that the permission number will override that restriction. For example, if the instructor does not want a permission number to override a course requisite, then s/he should uncheck that box.
Permission numbers will not work if all override boxes are unchecked. Instructors can generate permission numbers and adjust overrides using their Class Roster, so let them know how it works.