This is a tutorial only. No login is required.
INTRODUCTION
This guide reviews how CSUN staff granted security access to the Schedule of Classes (SOC) combine two or more class sections whereby students participate in a single class environment with one professor, one location and one meeting pattern.
In this two-step process, you'll first create a title and description using the Combined Sections Table. Secondly, you'll enter class criteria using Identify Combined Sections. After saving, the meeting pattern in one class will automatically be copied to all other classes in identified in the grouping.
IMPORTANT!
- Before you combine sections be sure that a facility, meeting pattern and instructor exist in only one of the classes you are combining.
- Uncombine classes that will be changed or canceled. This will prevent orphan data (buffer errors) from occurring. Write the meeting pattern down because SOLAR will delete the pattern from all classes in the group once it is uncombined. Only programmers in IT can remedy buffer errors.
Requirements:
- Once classes are combined, use Schedule Class Meetings to adjust meeting patterns and instructor assignments.
- Cannot combine a lecture with its corequisite lab because students cannot take 2 different courses at the same time.
- Classes with multiple meeting patterns should not be combined such as hybrid classes.
- Once a class is assigned an exam, it cannot be combined. Try this workaround: Jot down the exam information > Delete the exam row and save > Combine the classes > Add the exam information to one class and all other classes in the group will get the exam automatically.
- Students will be unable to enroll in a combined section class if the enrollment capacity is blank or less than the number of allowable seats for the sum total of the individual class sections.
- Students will be unable to wait list for a combined section class if the wait list capacity is blank or less than the number of allowable seats for the sum total of the individual class sections.
Canceling "No Enrollment" Classes:
If one class in a combined group does not have enrollment, you'll be asked to cancel it. When a class is canceled, all meeting patterns in a combined group are dropped and you'll have to manually add it back in. To avoid this and remove the class from the Low Enrollment report, do not cancel the section. Instead:
- Change the Enrollment Capacity to zero.
- Change the Class Status to tentative.
Step 1
After logging into the myNorthridge Portal:
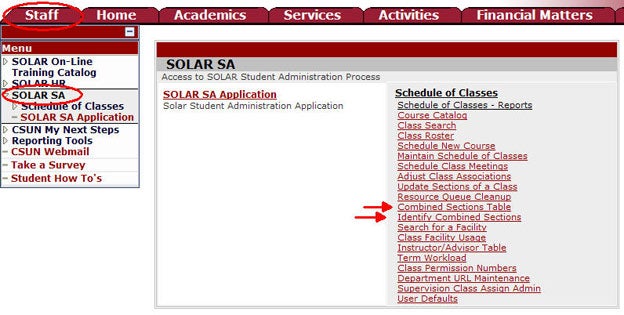
- Click SOLAR SA.
- Click Combined Sections Table.
Step 2
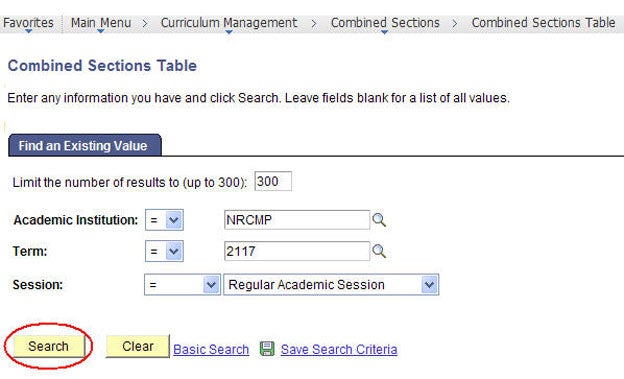
The Find an Existing Value page displays.
- Enter the Term and Subject.
- Click Search.
Step 3
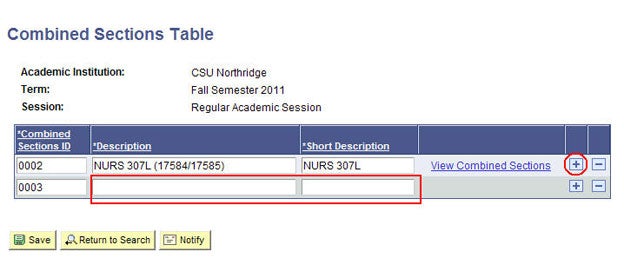
The Combined Sections Table displays.
- Click the plus sign (+) to add a new row.
- Enter a long and short description that holds meaning for both you and other users.
- Click Save. A View Combined Sections link displays.
- Click the View Combined Sections link to specify the criteria.
Step 4
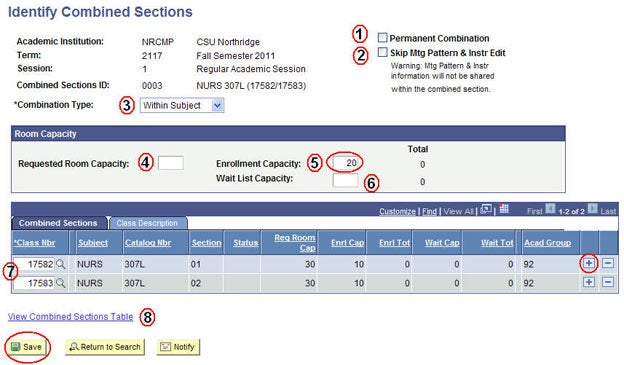
The Identify Combined Sections page displays. Specify the combined criteria using the 8 fields listed below:
- Permanent Combination
- Skip to Mtg Pattern and Instr Edit
- Combination Type
- Requested Room Capacity
- Enrollment Capacity
- Wait List Capacity
- Class Number
- View Combined Sections Table
Click the Save button to save your entries.
Step 5
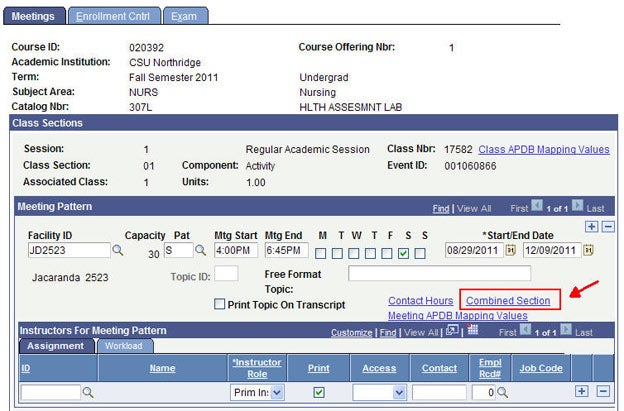
Once classes are combined, adjust meeting patterns using the Schedule Class Meetings component.
Verify the meeting pattern and instructor for all classes in the group.
A Combined Section link is added to the Meetings page so users know the section is combined.
Changes made to one pattern will automatically be made to all other classes in the group.